

Developer setup for PostgreSQL on Docker
A guide to set up your local environment for developing SQL with Docker containers.


Introduction
In this short post, I will guide you through the process of running a PostgreSQL container along with a pgAdmin container. After that, I will show you how to connect to the database instance using the pgAdmin portal to run your queries. You can use this as a simple setup for development purposes with SQL, as part of your application, or simply to practice your SQL skills.
I will be using Docker (Version 19.03.13) on CentOS 7. Please install the same on your machine before proceeding ahead. Please refer to the official documentation for installing steps.
Starting PostgreSQL Instance
What we will do here is to first download the PostgreSQL image, check that the image is ready and finally run the image with specific parameters.
You can download the Docker official image for Postgres from the docker hub repository by running the following in your command line.
$ docker pull postgres
You can find the documentation of the image here: PostgreSQL Image Documentation .
After downloading the image you can check that is available to use:
$ docker images

REPOSITORY    TAG       IMAGE ID        CREATED        SIZE
postgres      latest    9907cacf0c01    2 weeks ago    314MB
We will create a local folder and mount it as a data volume for our running container to store all the database files in a known location for you. In the “run” command, we will map also the ports from the host to the running container and a password for the Postgres default user.
## 1. Create a folder in a known location for you
$ mkdir ${HOME}/postgres-data/

## 2. run the postgres image
$ docker run -d --name dev-postgres -e POSTGRES_PASSWORD=Pass2021! -v ${HOME}/postgres-data/:/var/lib/postgresql/data -p 5432:5432 postgres

## 3. check that the container is running
$ docker ps
CONTAINER ID        IMAGE               COMMAND                  CREATED             STATUS              PORTS                    NAMES
dfa570d6e843        postgres            "docker-entrypoint.s…"   27 hours ago        Up 3 seconds        0.0.0.0:5432->5432/tcp   postgres-test
Great, you have a running PostgreSQL instance and you should be able to enter the container from your command line and test the database instance:
$ docker exec -it dev-postgres bash

>> Now you are in the container's bash console. Connect to the database
root@dfa570d6e843:/# psql -h localhost -U postgres

>>
psql (12.2 (Debian 12.2-2.pgdg100+1))
Type "help" for help.

postgres-# \l
List of databases
Name       |  Owner   | Encoding |  Collate   |   Ctype    |   ...
-----------+----------+----------+------------+------------+------
postgres   | postgres |   UTF8   | en_US.utf8 | en_US.utf8 |   ...
You should see the Postgres database and a similar output as the one above. That’s all for the database service, let’s set up the DB admin tool now.
Starting the pgAdmin instance
pgAdmin is the most popular and feature-rich Open Source administration and development platform for PostgreSQL. You will use it to manage the DB instance as well as to run your queries against the tables of it. You will be using this docker image to deploy it in a container. Get the image and run the instance of the image with the following commands:
$ docker pull dpage/pgadmin4
$ docker run \
    -p 80:80 \
    -e 'PGADMIN_DEFAULT_EMAIL=user@domain.local' \
    -e 'PGADMIN_DEFAULT_PASSWORD=SuperSecret' \
    --name dev-pgadmin \
    -d dpage/pgadmin4
The parameters that we are passing to the docker run command are:
-p 80:80: This parameter tells docker to map the port 80 in the container to port 80 in your computer (Docker host)-e 'PGADMIN_DEFAULT_EMAIL: Environment variable for default user’s email, you will use this to log in to the portal afterward.-e 'PGADMIN_DEFAULT_PASSWORD': Environment variable for default user’s password.-d: This parameter tells docker to start the container in detached mode.dpage/pgadmin4: This parameter tells docker to use the image that we have previously downloaded.
Let’s check that the container is up and running, you should also see the previous container running:
$ docker ps

>>
CONTAINER ID        IMAGE               COMMAND                  CREATED             STATUS              PORTS                         NAMES
7b15fe4c1cbd        dpage/pgadmin4      "/entrypoint.sh"         43 hours ago        Up 5 seconds        0.0.0.0:80->80/tcp, 443/tcp   dev-pgadmin
That’s all you have all the services up and running. The next step is to connect from the pgAdmin console to the PostgreSQL instance.
Accessing the PostgreSQL from the pgAdmin tool
We haven’t defined any network for these containers so they should be running on the default one, and if you try to access the database or the web portal through their ports, connecting via localhost or 127.0.0.1 would work just fine; but if you try connecting from one container to the other, you might encounter some connectivity issues.
We will need to look for the IP address of the PostgreSQL container on our host, you can run this command for it:
$ docker inspect dev-postgres -f "{{json .NetworkSettings.Networks }}"
docker inspect return low-level information of Docker objects, in this case, the ‘dev-postgres’ instance’s IP address. The -f parameter is to format the output as a JSON given a Go template. The output should look like this:
{"bridge":{"IPAMConfig":null,"Links":null,"Aliases":null,"NetworkID":"60c21f5cfcaaff424a0e4a22463dc8f9a285993de04e7ac19ce5fd96bba56a47","EndpointID":"be6e45b659c30bd12aa766d7003a2887607053684b68574e426f8823104b18a2","Gateway":"172.17.0.1","IPAddress":"172.17.0.2","IPPrefixLen":16,"IPv6Gateway":"","GlobalIPv6Address":"","GlobalIPv6PrefixLen":0,"MacAddress":"02:42:ac:11:00:02","DriverOpts":null}}
Copy the IPAddress value into the clipboard, which is 172.17.0.2 in my case, you will need to define the connection in the pgAdmin tool.
The next step is to go to your web browser and type localhost:80.
 pgAdmin login portal, localhost:80. Source: Local
You should type the user email and the password you wrote when running the container.
Once you are in the portal, you will need to add a new server by clicking on the “Add New Server” and adding the right information on the pop-up window, make sure you add the IP address that you copied previously in the Hostname/address under the Connection tab.
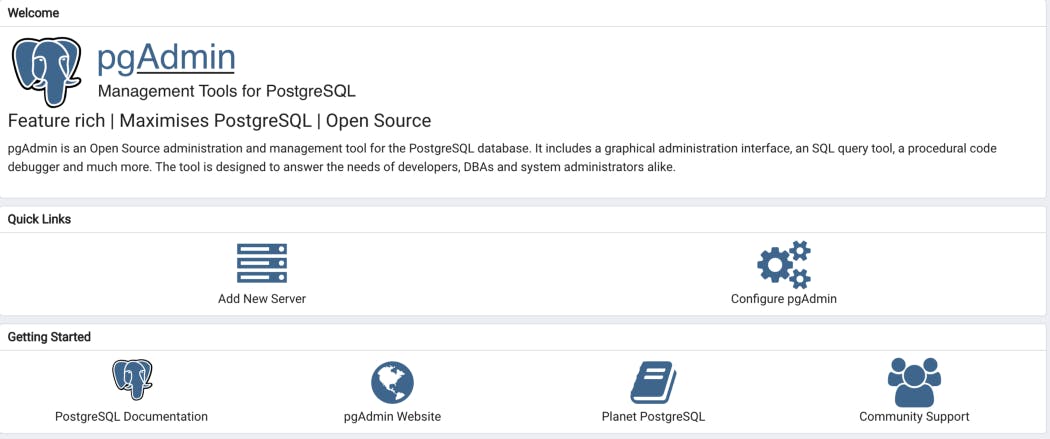 Welcome page from pgAdmin tool. Source: Local
Once you have created the connection you should see the server on the right side of your screen. At this moment you are ready to start building your databases and tables, uploading data, and querying for your analysis or applications.
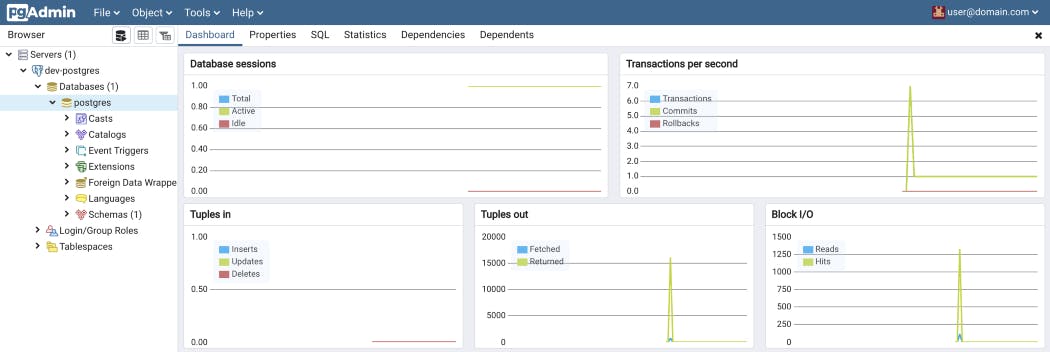 Server dashboard on pgAdmin tool. Source: Local
Wrapping Up
Let’s recap on what we have done so far:
- Independently run a PostgreSQL instance with Docker
- Independently run a pgAdmin server with Docker
- Setup the connection between the pgAdmin and PostgreSQL
You should be ready to start developing your databases, tables and queries on pgAdmin directly to your PostgreSQL. You can use the UI to import files directly to the tables.
Something else that you can do here is to connect to this database from a Python application on your local and then load the results to this Postgres database and query the tables using either python or the pgAdmin tool. It is up to you how you use this stack, the good thing is that you don’t need to wait for an infra guy to give you access to a database to start working on your main objective, which is your analysis, app, feature, or simply SQL training (even for your next technical interview assignment).
You can also do all this setup using a Docker-compose file, where you define the PostgreSQL service and pgAdmin service along with the environment variables, volume, and port mapping and run docker-compose up. The results should be the same.
I hope this article provided you with enough information about how to set up an SQL instance on your computer with Docker to directly work with databases, tables, and queries. Let me know if you have any questions or suggestions, I’ll be happy to follow-up with you.